Working as a UI/UX designer, I use Sketch to create most of my interface designs.
Along the way, I’ve learned a few things that helped me work smoother and faster.
Here are the 10 tips that I find most helpful when working with Sketch.
1. Use shortcut for Pick Color (Ctrl + C)
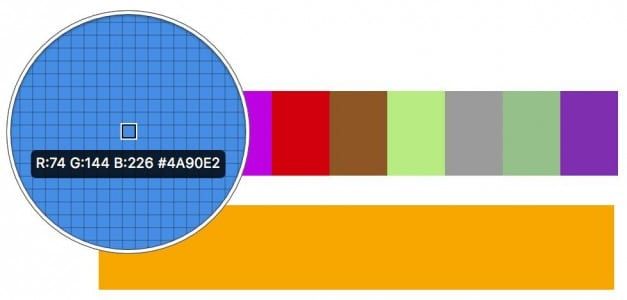
‘Pick color’ is one of the most underrated functions in Sketch. The ability to copy any object’s color instantly is imperative, yet this function is hidden deep inside the Fill option.
What’s nice about Sketch’s Color Pick is the zoomed-in magnifier view to increase precision and can also be used outside the app. Ctrl + C is one the most used shortcut in my opinion and this neat little trick makes a big difference in productivity.
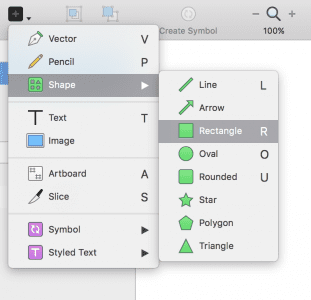
2. Use shortcut for Inserts
Rectangle – R
Circle – O
Line – l
Vector – V
Text – T
At its core, we use shapes and text to construct our design in Sketch. It is important to learn the shortcuts to insert basic objects in Sketch so that you can quickly create the building blocks of your design. Furthermore, they are easy to remember and execute.
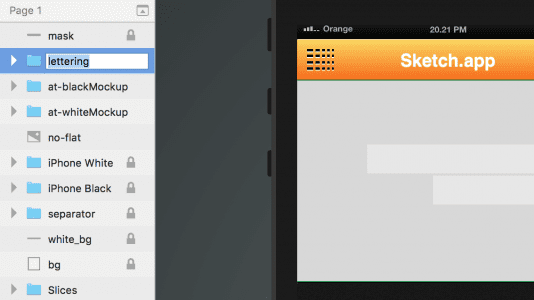
3. Rename layers rapidly (cmd + R , tab)
If you use a naming convention to keep your files organized, you will know that renaming layers is very time consuming.
Use cmd + R to enter edit mode to rename the layer. You can also tab through layers (while still in edit mode) to rapidly rename all layers.
4. Focus on layer while moving (alt + cmd)
Moving a selected layer that is obscured by another layer above is a delicate act.
You’re standing on a fine line between accidentally selecting the above layer and your intended layer. Holding alt + cmd will focus your selection so you will never waste time on moving the unintended layer.
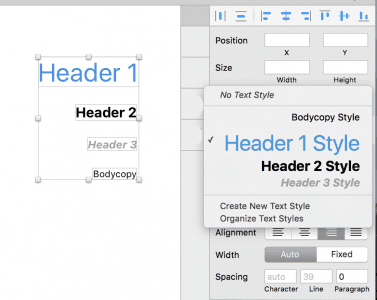
5. Use Text Style/Object Style for repeated style
When working with text heavy projects, it’s always a good idea to create a shared style of the given text, as it will save you a great deal of time.
Sketch’s shared styles is extremely easy and it works on object styles as well.
Grab design ebooks created by best designers
All for free


Do you want to know more about UI Design?
Download 'Free Ebook: Web Design Trends 2016' FOR FREE!
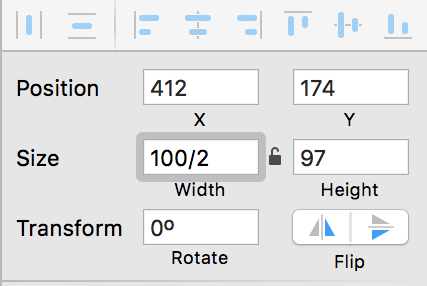
Download e-book for free6. Use math to quickly resize object accurately
You can resize object by using the input field on Sketch’s sidebar.
This will speed up your process of creating precise measurements of the object and keeping your design consistent. The magic here is that you can use math (divide, multiply, add or subtract) in the input to resize.
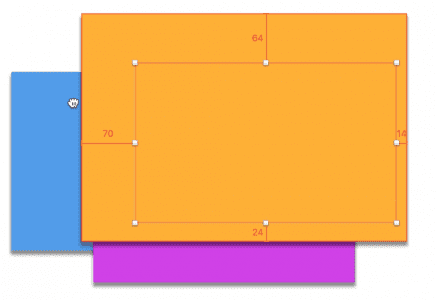
7. Use ‘ALT’ to show object margin (Hold ALT)
Moving objects around and instantly seeing the margin between them can save you a lot of time when aligning objects for consistent spacing.
Just select the object and press ALT. You can also select a second object to see the distance between them by simply moving your mouse over.

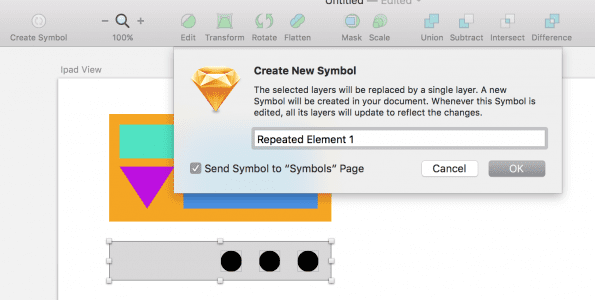
8. Creating symbols for grouped object
Dealing with repetitive elements can be risky.
You might end up making tiny tweaks on each duplicate for every little change in design. Instead, try developing the habit of creating symbols so you can apply changes to all repeated elements on the fly.
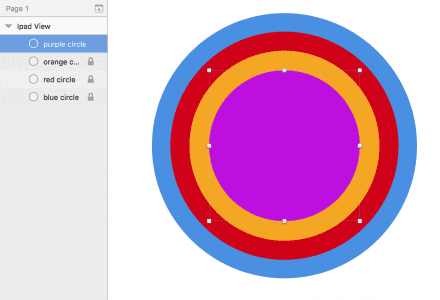
9. Learn to hide/lock your layers to prevent mistakes
It’s frustrating to select the wrong layer in your design, especially with multiple overlaps.
You will find that learning the shortcut to locking/hiding layers will help boost your productivity as you make less accidental selections.
To unlock a de-selected layer, you can right-click and choose “Unlock layer”.
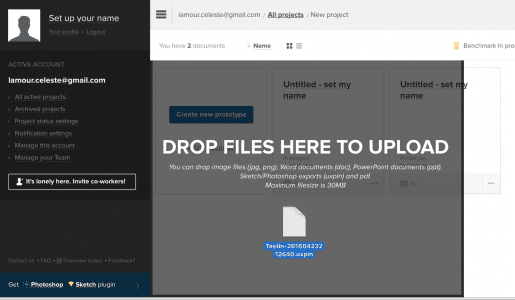
10. Make your Sketch file interactive
Once you’ve downloaded the UXPin plugin, you can turn all your layers into an interactive prototype just by exporting the selected artboard into UXPin.
Thanks to the preserved layers, you’ll save plenty of time exporting/recreating layers so that you can focus on the interaction models and micro-interactions within your design.
Next Steps
If you found these tips useful, check out the free UX Design Builder’s Ebook bundle.
The bundle includes 3 e-books with wireframing, mockups, and prototyping best practices. Lessons are also included for Sketch and Photoshop.

Feature photo credit: Designmodo